
Our powerful drag & drop editor makes managing your page a breeze

Luke Geaves
Managing websites can be a pain, but with the to.co Page Editor, your page layout can quickly be updated to best represent your organization.
Editing your page
Once logged into your to.co account, navigate to the Orgs page by selecting "Orgs" from the menu. You'll see a list of organizations that you manage and are watching. Click the Edit button to start editing your organization on the Org Admin dashboard.
From the Org Admin dashboard, select "Page Editor" in the menu to open up the to.co drag & drop editor.
Or go straight to the Page Editor by going to the Page Editor.
Page editor and your data
At to.co we believe it's important to get business data right. To make sure that your page shows the most accurate information, we make a connection between your page layout and your organization data, so that no matter where it is edited, the correct information is shown, all the time.
Add a panel to your page
From the Page Editor, there is an option to "Add" a panel. Click the button and you'll be presented with options of different panels to add to your page. Choose an option such as "Email" to add a panel to your page that links to your organization's email address.
Panel types to choose from
We have grouped the different panels into five categories:
- General: The most important information you may wish to share on your page
- Media: Images, Videos, and web pages embedded into your page
- Social: Links to your social media pages and accounts
- Actions: Add contact forms and links to your menu, web shop, and reservation page
- Extras: Other panels including lists of your products and services
Drag and drop layout position
It's quick and easy to set your page layout order using the drag and drop editor.
From the page preview, you can click and drag any panel to re-order the layout.
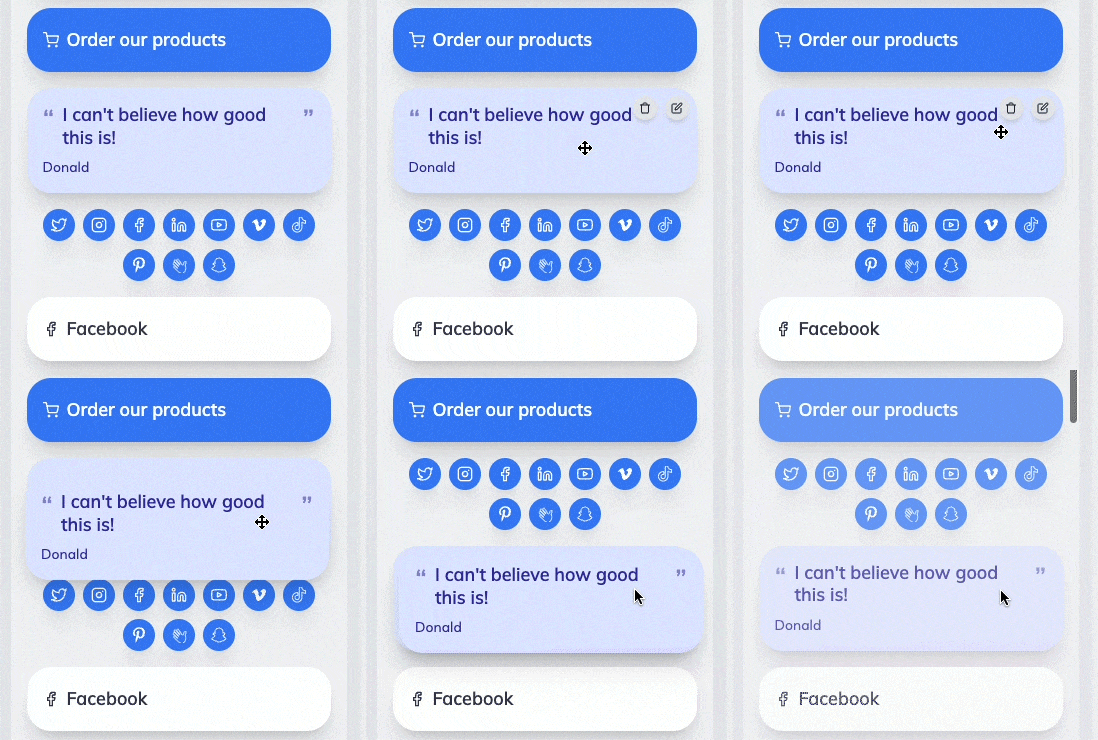
We recommend editing the layout while in the desktop view (click the "Desktop" button in the top menu) so your page always looks its best.
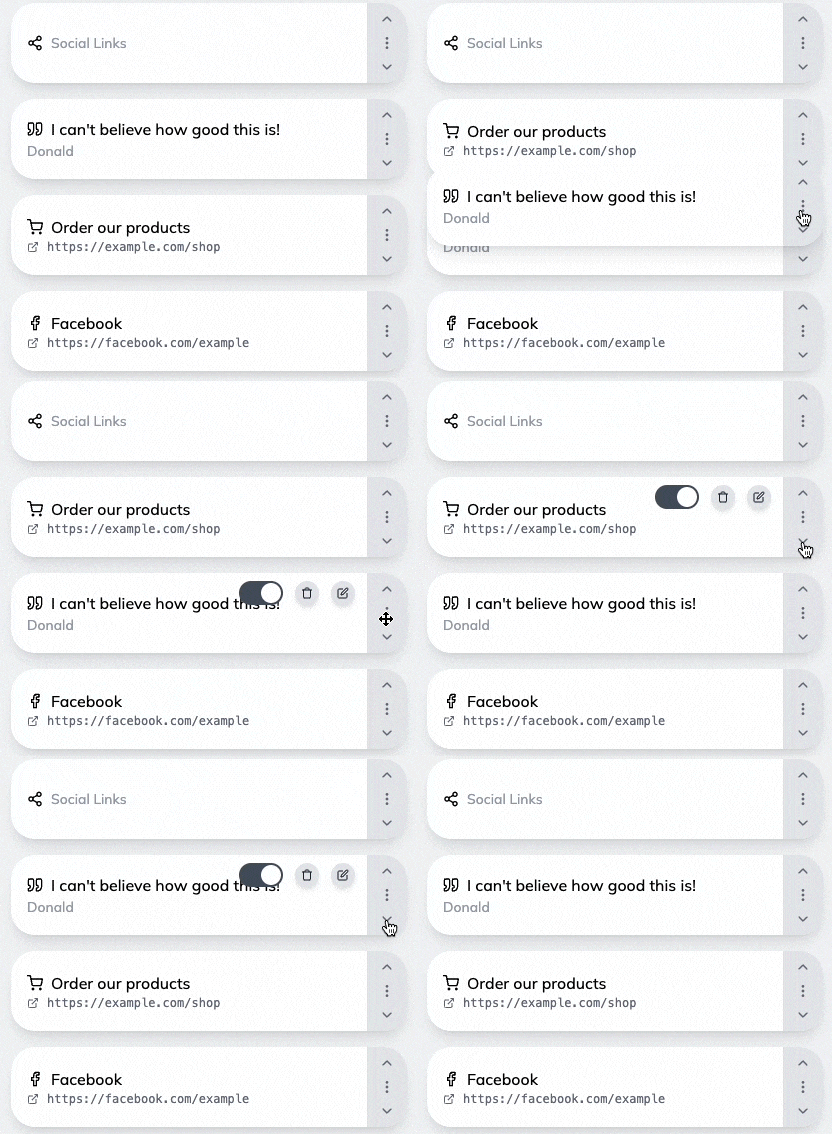
You can also re-order your layout using drag and drop or the up and down arrows in the Page Editor.
Linking panels to other websites
Some panels have the option to add a link to another website. This creates a hyperlink on the panel so that your page visitors can click the panel to go to another website address.
When you click to edit a panel, you may see a Link URL field. This depends on the type of panel as those linked to your organization's data (Phone, Email, Website URL) will always link to the data specified. Other panels such as Image, Quote and the General Panel (The "Add Panel" option) allow you to enter a link of your choice. This can be useful to link to blog posts, articles, or another website address of your choice.
To add a new panel that links to your blog, or other website URL:
- Click the "Add" button, then select "Add Panel". This creates a new generic panel in your layout.
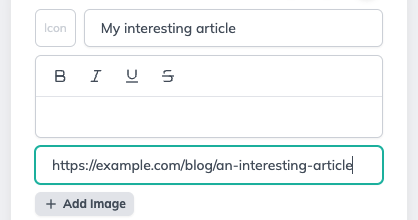
- Enter a Title for the panel in the field labeled "Title text".
- Copy and paste your link into the Link URL field.
- Click the green tick button to finish.
Page Preview on Desktop and Mobile
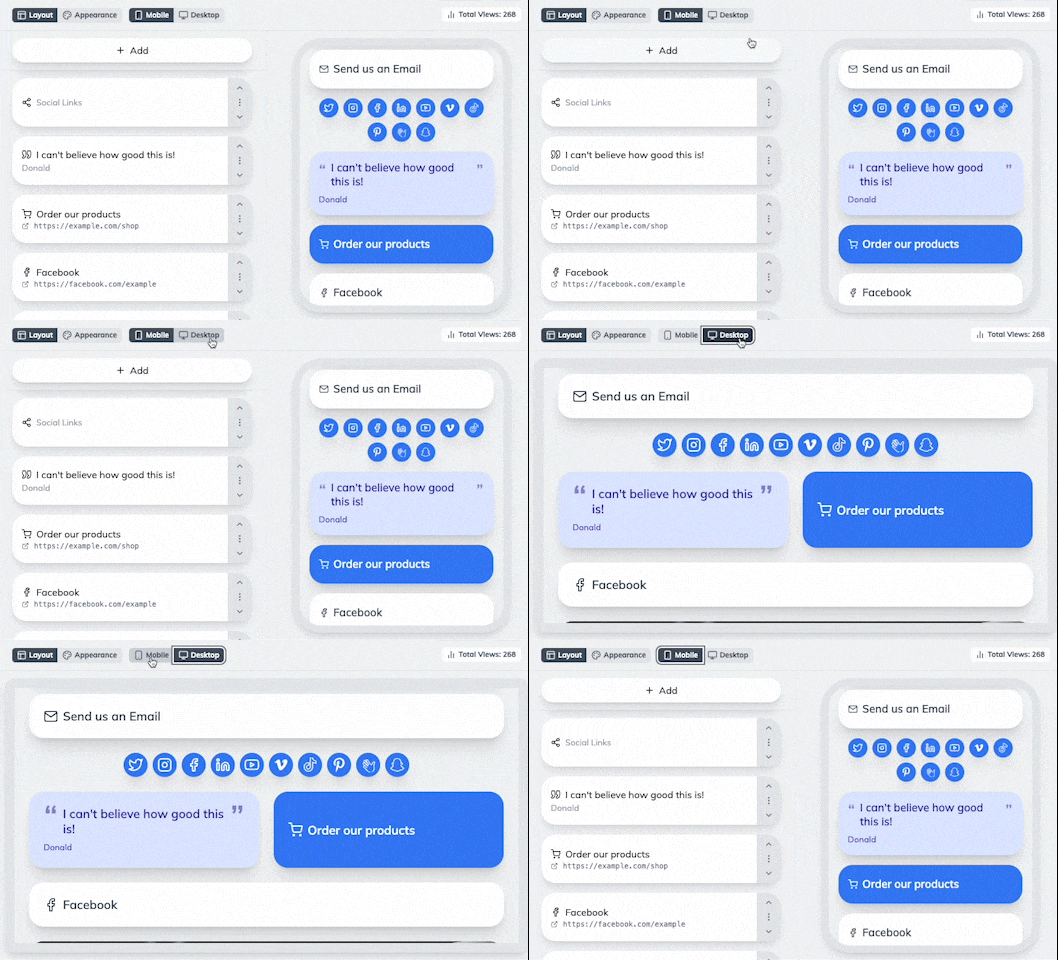
We want your page to look its best no matter what device your audience uses, so we made it easy for you to preview your page on Mobile and Desktop in the Page Editor. Simply use the "Desktop" and "Mobile" preview display options found in the top menu of the Page Editor to switch between previews.
Panel options
Each panel can be configured to change the look and feel of your page. We support panel themes, size, text alignment, text size, and even more with the Appearance Editor.
Panel Icon
Choose from hundreds of icons to display in the title of each panel. Simply click to edit a panel, then click the existing icon (or "Icon" text when there is not one already), then select from the list of supported icons.
Panel Styles & Themes
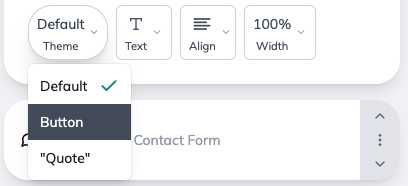
Most panels let you choose a panel style to customize the look and feel of your page. After clicking to edit a panel, the option for "Style" will let you pick from themes from your page appearance. Customize the look and feel of each theme within the appearance editor.
- Default: This style is applied to most panels on your page, the default theme is a white panel with dark gray text
- Button: Some panels use the button theme to highlight certain options on your page. This includes the Contact Form and panels in the Action group. The default theme is a blue panel with white text
- Secondary: Specially designed panel used for showing off customer quotes. This style can include speech marks around the panel title (quoted text) and smaller text to note the author of the quote. The default theme uses a light indigo panel with dark indigo text.
- Accent: An extra style for adding a further color dimension which can be used for highlighted panels.
Panel Width
Panel width lets you customize the look of your page when viewed on a desktop. When editing your page in the Page Editor, click the "Desktop" button to view your page preview on a larger screen. From the Desktop preview, you can hover over a panel and click the Resize icon to cycle through panel widths.
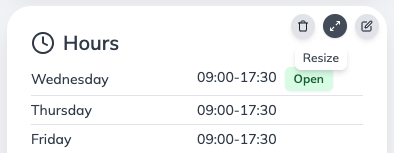
Please note that panel width is only applied to panels when viewed on a desktop or a device with a screen width of 960px or larger
What are you waiting for?
Register FREE to try out the to.co Page Editor.