Getting Started with the Zapier Integration
Follow these steps to create your first Zapier integration with to.co:
Go to the Integrate page and click the "Get Started" button. This will take you to the to.co App on the Zapier App Store.
Click the "Connect to.co to 5000+ apps" button.
You may be prompted to Sign In/Up with Zapier now.
Zapier Sign Up
You may already have a Zapier account, in which case, you should Sign In, before continuing.
If you do not have a Zapier account, go to https://zapier.com/sign-up to get started. you can use existing Google, Facebook or Microsoft accounts for a quick sign-up process.
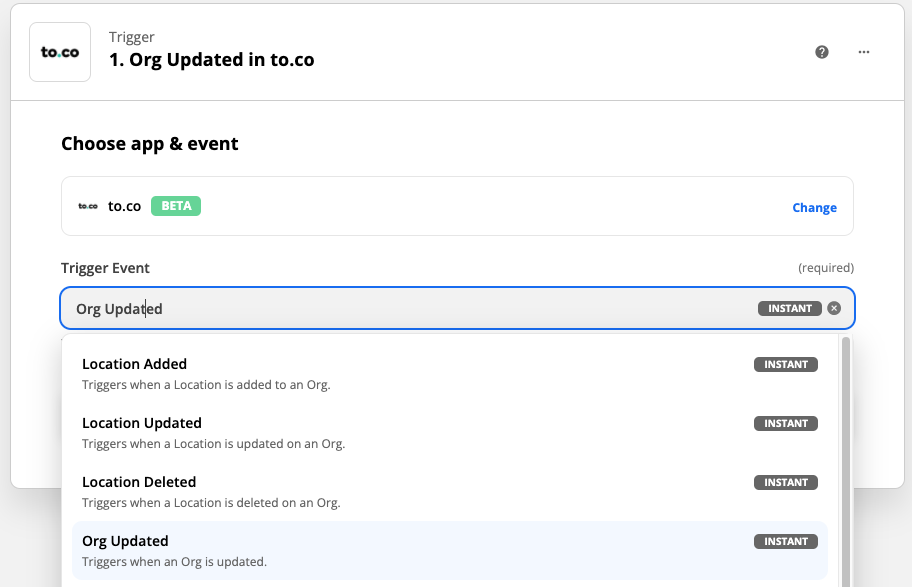
Choose Trigger
You should now see a Zap Editor with a "Trigger" of "to.co".
Select "Org Updated" from the "Trigger Event" selector.
Click "Continue".
You will now be asked to "Sign In to to.co". Click the button.
This will open a new window that will ask for your "to.co API Key".
to.co API Key
Create or find an API Key by going to https://my.to.co/integrate/api.
If you do not have an API Key, click the "New API Key" button, enter a name for the new key, and click "Create API Key"
You can now copy your API Key from the API Keys page, by clicking the copy button, or selecting the 24 digit key and copying it to your keyboard.
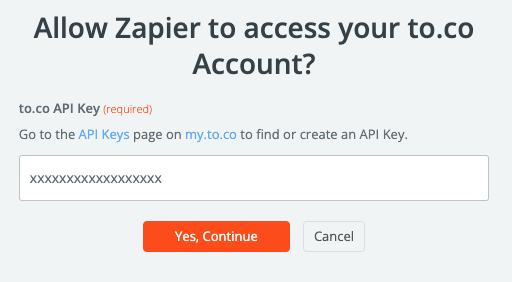
Enter you to.co API Key into the input box, and click "Yes, Continue".
Click "Continue".
Next, Zapier will ask to "Test Trigger". You may see some results if you are following some Orgs in to.co already. If not, click the "Test test" button.
Click "Continue".
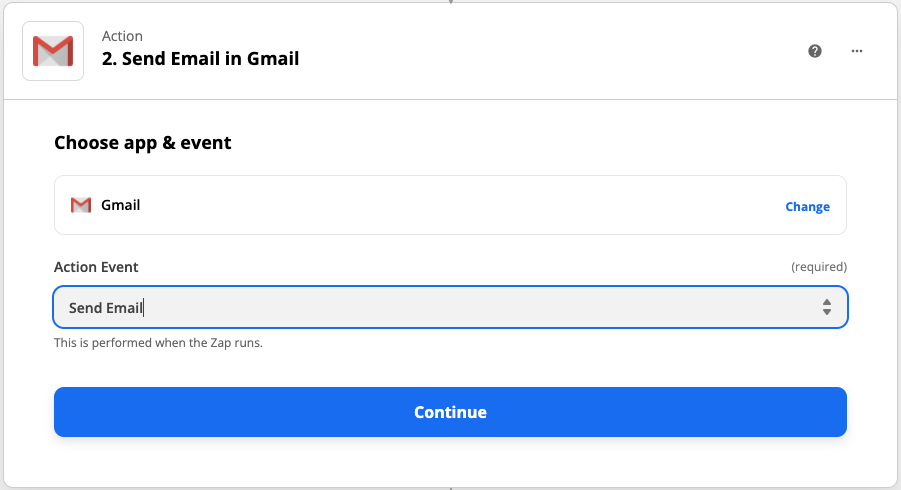
Choose Action
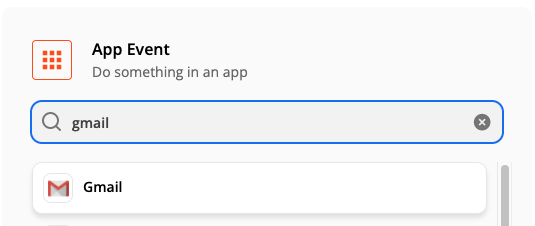
Next, you should be prompted to select an "Action", if you do not see this, then click the Plus button (+) below the panel.
For this example, we will select the "Gmail" Zapier App from the options by typing the name into the search box.
Next, choose "Send Email" in the "Action Event" selector.
Click "Continue"
You may be asked to "Sign In to Gmail", click the Button and follow the steps to link Zapier with your Gmail Account.
Click "Continue".
Set up Action
Next, you need to fill out the following options in the "Set up action" form.
| Field | Description |
|---|---|
| To | Enter you email address you wish to receive notifications. |
| From Name | Enter "to.co Updates" |
| Subject | Enter "Org updated " then select "New Informal Name" from the dropdown box. This will input data from the to.co trigger into the email subject. |
| Body | Populate the body with the fields that you are interested in, from the Trigger event. |
Click "Continue"
Test + Complete
You will now get a summary of the Zap you have set up, If you are happy with your choices, click the "Test & Continue" button.
If everything went as planned, you should see a message "Test was successful!"
Check your email inbox, you should find a new email with the information you entered into the "Set up action" form with some example data.
Click "Turn on Zap" and you are done!